Breaking into the PC gaming world can be expensive.
If you’ve got friends who own gaming PCs, you might have heard about their sweet new liquid cooling system that “only” cost a few hundred dollars.
At those prices, it must cost an absolute fortune to build a gaming PC, right?
That’s true if you want to build a bleeding-edge rig that’s meant to run games at max settings for years to come.
But if you’re not looking to buy exclusively high-end components, you can definitely build an affordable budget PC for just $400!
If you’re curious about what this system would look like, keep reading!
Table of ContentsShow
The Best Cheap $400 Gaming PC Build For 2025
Updated: July 8, 2026
Click on the product images to view the product on Amazon, where you can see more images in high resolution and check the current price.
< | CPU | AMD Ryzen 5 5600GThis AMD’s CPU with integrated graphics is the best gaming option for budget builds. With the improvements brought forth by Zen 3 architecture, the Ryzen 5 5600G beats any other APU available at this price |
 | Cooler | Wraith Stealth CoolerThe Wraith Stealth is an excellent stock cooler that can keep up with the AMD Ryzen 5 5600G while keeping perfectly silent, even at higher loads |
| GPU | Radeon RX Vega 7The Radeon RX Vega 7 integrated graphics built into the Ryzen 5 5600G is currently the king of integrated graphics and will let you comfortably run most modern games at medium settings in 1080p |
|
 | RAM | Patriot Viper 4 Blackout 8GBIf you're looking to get the most out of your integrated graphics without overspending there's no better option for RAM than the 8GB Patriot Viper 4 Blackout |
 | Motherboard | MSI B450M PRO-M2 MAXThe MSI B450M PRO-M2 MAX is a simple motherboard, but one that has all the features you'll need to run this budget build |
 | SSD | Western Digital Blue SN550 500GBAs far as NVMe SSDs go, the Western Digital Blue SN550 is not the fastest one out there, but it's a significant step up from any 2.5 SSD, let alone an HDD |
 | Power Supply | Corsair CV 550WThe Corsair CV 550W strikes a fine balance between affordability and quality |
 | Case | Cooler Master Q300LThe Cooler Master Q300L has an appealing and convenient build which allows for hassle-free assembling and decent airflow - just what you want from a budget case |
PC Overview
To make this system work as well as possible, we had to set some ground rules.
Before we take a closer look at all the parts, let’s talk about what we’re trying to achieve with our $400 gaming PC.
Console-Level Performance
Now, it’s important to mention that by “console-level performance,” we mean the Xbox One and the PS4. This might sound disappointing, but it’s far from it. Just think of all the games you can play on these consoles and how they look and then imagine having a $400 PC that can do more or less the same.
It’s far from a bad deal.
If you were to buy one of the aforementioned consoles, or one of their variants, $400 is about as much as you would have to spend, so we were looking to hit a comparable baseline performance with this PC.
Hardware-wise, this system checks many boxes. Granted, it will struggle more than these consoles at 1080p simply because games are optimized for console hardware. However, you will be able to run most games at 1080p with 30-ish FPS after some tweaks to the graphics settings.
If not, 900p and 720p are always an option. We’ll talk about this in more detail when we get to the GPU and RAM sections of the article.
While this performance discrepancy is unfortunate, you’re making a significant trade-off in terms of upgradeability.
Easy To Upgrade
The main benefit of buying a PC as opposed to a console is upgradability.
Dollar for dollar, a game console is going to give you better performance out of the box than any gaming PC. But once you buy it, you’re locked in. If you want to upgrade, you have to wait for the next generation and buy a whole new system. With a PC, you can upgrade as you go.
Want to play a new game but need better graphics? Upgrade your graphics card.
Want faster load times? Install an SSD or get more RAM.
Want to improve performance in games with lots of NPCs or bots? Get yourself a better processor.
We’ve built everything around AMD architecture and their AM4 socket, so you can upgrade any individual part without having to replace half of your machine.
Dedicated Gaming PC
Let’s not beat around the bush here; we’re building a $400 PC. To get a PC to run modern games at that price, it will have to be optimized for gaming, meaning it won’t do other things that you might otherwise like it to.
For example, this PC doesn’t have a disc drive. Since most PC gamers nowadays download their games via Steam or some other online gaming platform, it didn’t seem like a smart way to spend a chunk of our limited budget.
Another thing we skipped on was a wireless card. These can be nice to have, but an integrated wireless card drives up the cost of your motherboard without doing anything to boost your gaming performance.
It’s not that we don’t like these features. It’s just that they aren’t really necessary for gaming. That said, what you will see below is a very bare-bones system, but one that’s ready for gaming without a single additional cent invested in it.
The PC Build
Now that we’ve set some expectations, let’s go over our parts one by one and talk about alternative parts when applicable. Here’s everything you need to know about our components for the best $400 gaming PC build.

CPU: AMD Ryzen 5 5600G
After years of being limited to the AMD Ryzen 3 3200G and the AMD Ryzen 5 3400G, PC builders now have an amazing new option for their budget machines — the AMD Ryzen 5 5600G.
The AMD Ryzen 5 5600G is AMD’s new gen, Zen 3 APU. The CPU is equipped with:
- 6 cores,
- 12 threads,
- A 3.9 GHz base clock speed, and
- A 4.4 GHz maximum clock speed.
As all AMD processors, the Ryzen 5 5600G is unlocked and comes with its own stock cooler, which we’ll talk about in a minute.
This APU is currently the best option for budget-conscious gamers looking to spend no more than $400-500 on their gaming rig. Upon launch, the 5600G practically made low-end dedicated GPUs such as the NVIDIA GT 1030, obsolete, which should say plenty about its capabilities.
For the first time ever, there’s an integrated graphics card that can actually run modern games at decent FPS and graphics, at 1080p.
Looking at CS:GO, for example, the FPS goes up to 150 on high settings. Valorant reaches similar framerates after a few adjustments to the graphics settings. Resident Evil Village goes up to 45 with mid graphics, the same goes for Genshin Impact, and Doom Eternal and Borderlands 3 hover around 35 FPS on low-medium settings.
Overall, the AMD Ryzen 5 5600G offers excellent value, and it’s currently the best possible option for a $400 build.
Cooler: Wraith Stealth
Another great thing about this CPU is that it comes with its own cooler. The AMD Ryzen-line of CPUs is well known for its excellent stock coolers.
Although the Wraith Stealth is not among the best of them, this stock cooler does wonders when coupled with the AMD Ryzen 5 5600G even under heavy loads.
If you’re dead set on overclocking, you’ll want to look at some aftermarket solutions, but this isn’t necessary for this build. It’s not fancy in any way, but it gets the job done, which should be the main priority when working with a budget like this.
GPU: Radeon RX Vega 7
The Radeon RX Vega 7 isn’t a separate graphics card. As we’ve discussed, it’s integrated into the Ryzen 5 processor in our build, so you won’t have to make a separate purchase.
This has its advantages and disadvantages.
On the downside, an integrated graphics card doesn’t have dedicated video RAM. This puts it at a disadvantage compared to dedicated GPUs, which have their own onboard VRAM for storing graphics assets.
An integrated card has to rely on your PC’s RAM, which can slow it down, particularly while playing more demanding games.
On the other hand, an integrated card is much, much more affordable.
A basic dedicated GPU will cost you almost as much as a second processor, while the more mid-range and high-end ones go for hundreds of dollars. An integrated graphics card, however, will only add a fraction to your processor’s cost, and a card with 7 cores operating on 1900MHz such as this one is worth every penny.
Second, higher-end graphics cards can often get bottlenecked by your processor or RAM. If either of those components is slower than your graphics card, you can waste a lot of money installing an expensive GPU that does nothing for you.
RAM: Patriot Viper 4 Blackout 8GB (2 x 4GB)
RAM plays a pivotal role in the level of performance when using integrated graphics, since a portion of it is being used as VRAM.
What’s cool about VRAM is that it generally uses faster memory with higher bandwidth. At the moment, most GPUs use DDR6 memory, some bleeding-edge GPUs like the RTX 3000 ones use the DDR6X, and some older models such as the RX 570 use DDR5. Meanwhile, regular RAM sticks still stick to DDR4.
So how can you get your DDR4 performance at least a bit more in line with what you would get from a dedicated graphics card with, say, DDR5 VRAM?
Three things help with this:
- Dual-channel memory
- Faster memory
- More memory
Dual-channel memory is paramount when you’re dealing with integrated graphics because it essentially doubles your bandwidth. The performance increase will depend on many things (the game in question, the CPU, etc.), but there will be a performance increase in the form of a higher FPS count.
Faster memory takes this a step further. So, for this build, we’ve chosen the 8GB of dual-channel Patriot Viper 4 Blackout clocked at 3000MHz. This is one of the best budget RAM options out there if you’re looking to get the most out of your integrated graphics.
Now, 8GB of RAM may not be ideal for this kind of PC, but it’s the most we could include considering the budget. That said, we highly recommend upgrading your RAM to 16GB at some point. This is the cheapest way of improving your PC’s performance without having to buy a dedicated GPU.
As for the speed, the difference in performance that faster RAM will have will vary from game to game, but overall, you should expect to get around 10FPS more than you would with, say, 2133MHz RAM, which is a significant improvement.

Motherboard: MSI B450M PRO-M2 MAX
Full disclosure before we begin — as the most important component of this build, the AMD Ryzen 5 5600G took up the largest portion of the budget, so other pieces of hardware that don’t directly contribute to gaming performance had to suffer. The motherboard was one of them.
For this $400 build, we chose the MSI B450M PRO-M2 MAX mainly because it fit the budget and could support the chosen APU. That said, this is a very basic motherboard, and you shouldn’t expect much by way of special features.
The MSI B450M PRO-M2 MAX sports:
- Enough USB and SATA ports for the purposes of this budget PC,
- 1x HDMI,
- 1x DVI-D,
- 1x VGA port, and
- 1x M.2 slot.
A major downside of this board is that it has only two DIMM slots, which will make it a bit more difficult to upgrade the RAM.
One important thing to mention about this motherboard is that it will require a BIOS update before it can run the Ryzen 5 5600G. However, the board doesn’t have a BIOS Flashback feature. This means that you will need a working dedicated graphics card to update the BIOS before installing your new 5600G APU.
This is a major inconvenience, but one that, unfortunately, comes with the ‘budget’ tag.
The MSI B450M PRO-M2 MAX is still a decent, serviceable motherboard, albeit with a few quality-of-life features missing. If you wish to get a slightly better-equipped board, keep in mind that you will either have to be ready to increase your budget, or hunt for discounts.
If you want to check out some other motherboard options, check out the link below.
SSD: Western Digital Blue SN550 500GB
As for storage, SSDs are technically the norm nowadays, so naturally, we went with an SSD over an HDD. While you would get more storage out of an HDD for the same or even lower price, the advantages of SSDs are just too great to pass up.
But we didn’t opt for just any SSD. We went one step further and chose a Western Digital Blue SN550 NVMe with 500GB of storage.
If an SSD is ten times faster than an HDD, then an NVMe is ten times faster than an SSD. The difference is simply astronomical. Once you experience it, you’ll see what we mean.
Of course, if you prefer to have space over speed, then you can get an HDD with 1TB of storage for roughly the same price. Which one you choose will depend on what you value more and how soon you plan on investing more money into this PC.
Still, this guide is meant to show you the best possible items you can get for $400, so between an HDD and an NVMe, it’s obvious which one was bound to end up on this list.

Power Supply: Corsair CV 550W 80+ Bronze
Power supplies and cases are the trickiest components to shop for when building on a budget.
Your instinct is telling you to pour all your resources into pieces of hardware that impact in-game performance in a meaningful way, which these don’t. But having a low-quality PSU from a shady manufacturer carries more risk than anyone should accept.
What’s great about the Corsair CV is that it is a well-made PSU that you won’t ever have to worry about. It has :
- A quiet fan,
- Heavy-duty protection,
- Bronze reliability,
- A 3-year warranty,
- A reasonable price, and
- Standard wattage that will be enough to support even a dedicated graphics card.
All of this makes it a perfect fit for this build.
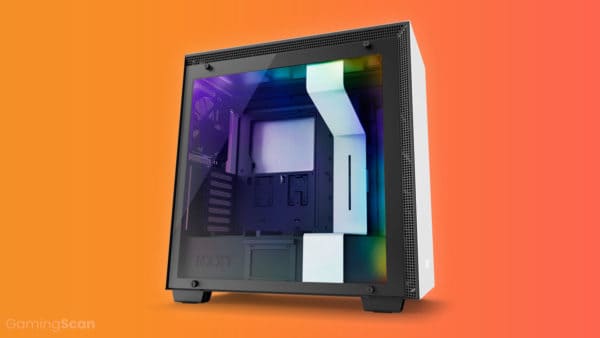
Case: Cooler Master Q300L
It should come as no surprise that most sub-$50 cases are bad.
At best, they’re just very inconvenient to build in or have sharp edges. At worst, they can block the airflow quite heavily and basically function as an oven (not to mention that many feature long outdated exterior designs).
But, there are some diamonds in the rough to be found amidst all the rubble. And one such diamond is the Cooler Master Q300L.
We certainly could have included a more expensive case in this build, but that would have meant cutting the budget for other performance-related components such as the APU or RAM. Instead, we decided to go with a decent, cost-efficient case that has the potential to turn into a good mid-tier case with just another external fan upgrade or two.
The Q300L is one of those few budget cases that don’t look cheap. It offers a decent amount of room for cable management. The airflow isn’t excellent, as it only comes with a single 120mm pre-installed fan, but it isn’t stilted either. Out of the box, it’s fine. If you add just a single front fan it’ll be great!
The case also has 2x USB 3.0 ports and has room for four additional fans in the top and front.
All dust filters (top, front, and bottom) are magnetic and easily removable.
All in all, it’s a decent mATX case with suitable upgradeability options that fit in this build perfectly.
One last thing that we have to mention about cases when building on a budget is that it’s always good to keep your eyes peeled for sales and discounts.
We didn’t want to feature a case that was on any sort of discount for this build just because we wanted to always have a good baseline solution. Still, if you can get a case that normally costs $60 or $70 for almost half the price, then you should definitely consider that as an option.
Peripherals
Congratulations! You’ve now built a fully functional computer tower for $400. Of course, a tower by itself is just an expensive doorstop. If you want to do anything with it, you’re going to need a few more things.
In this section, we’ll cover the basics: a monitor, a mouse, a keyboard, and, of course, an operating system. Since you may already have some of these things, we’ve listed them separately from the PC itself.
That said, you won’t be using your new PC without them, so make sure you’ve got room in your budget for at least the basic versions of these peripherals.

Operating System: Windows 10
For a gaming PC to be fully optimized for gaming it needs to have a good operating system, and right now Windows 10 is the best possible option.
We chose the 64-bit Home Edition of Windows 10 because the Professional Edition doesn’t offer any extra perks to gamers. If you do a lot of office-type work on your PC, you might want to consider an upgrade, but otherwise, the Home Edition of Windows 10 does everything you need.
The link above will lead you to the USB drive install of Windows because it’s compatible with our build and doesn’t require a disc drive. If you’re adding a disc drive to your PC, you can also buy the DVD install, but there’s really no benefit to using a physical copy at this point.
You may be wondering why we’re recommending an expensive operating system for your $400 gaming PC. There are two main reasons to choose Microsoft Windows:
- It works. You install it, and your computer runs. You don’t have to run a C++ compiler every time you install a program. You don’t have to configure every last setting manually.
- Everyone writes software for it. All your favorite PC games run on Windows, and other apps are easy to find as well.
If you’re considering a Linux build, keep in mind that Linux is a lot harder to use than Windows. You’ll need to take the time to learn how to use a UNIX command prompt and install programs using a C++ compiler. You’ll also be limited mostly to indie games since a lot of mainstream games either won’t run in Linux, or aren’t properly optimized for it.
If your budget is already stretched to the maximum and you need to install Linux to get yourself up and running, we strongly recommend SteamOS.
Like most Linux distributions, it’s free. It’s also designed by Valve, specifically for running games on Steam. It’s not made to use office programs, watch YouTube videos, or do anything else you’d expect to do with your PC. To install it, you’ll need access to a PC with a USB drive to download the install files and transfer them to your new rig.
Of course, you also have the option to get the free version of Windows 10, but this route comes with a few inconveniences like the pesky watermark in the bottom right corner of your screen, not being able to use the App Store, etc. However, if this is the only choice available to you go for it. It still beats any other OS when it comes to gaming.

Monitor: HP 24mh
Now, as for the monitor, we decided to go with the HP 24mh. There are several reasons why this monitor stood out for this particular build.
First of all, it’s a 24-inch monitor with an IPS panel, which will give you incredibly vibrant colors and a much better viewing angle than any other type of panel.
Second, it has a 75Hz refresh rate, which means that it will be able to register up to 75 FPS. While it’s not a huge improvement over 60, it will definitely show in games where such framerates are possible such as esports, for example.
Third, it has built-in speakers which, granted, aren’t anything to write home about, but can be extremely helpful if you don’t have separate speakers, or if they happen to malfunction.
Finally, the monitor looks great with its thin bezels on three sides and black and silver design that give it a much more premium look.
Now, something worth mentioning here is that this is a 1080p monitor, meaning that 1080p resolution will look great on it, but anything less than that — no so much. And since this build doesn’t have a graphics card, you’ll likely have to play some of your games on a lower resolution and therefore sacrifice the visuals along the way.
So here’s where you’ll have to make a decision depending on your plans for the future.
If the $400 you’re investing in this PC are simply your initial investment, and you plan on improving this system as time goes by, we suggest sticking with the HP 24mh because it really is an amazing monitor and it will still be perfect even when you add a graphics card.
If, on the other hand, you plan on using this PC as it is without any intention of upgrading it, then it might be a better option to go for something like the Acer SB220Q. This is still an IPS monitor with a 75Hz refresh rate, but it’s cheaper, and most importantly, smaller. Because of this stretching a 720p or 900p resolution won’t look as bad and pixelated as it would on a larger screen.
Both options are great, and choosing one or the other simply depends on how you plan to use your PC.

Keyboard, Mouse and Headset: Havit Mechanical Keyboard, Mouse, and Headset Kit
Since this is a budget build, we thought a bundle would be the best choice since you get several decent items for a surprisingly low price. So, if you’re looking for a keyboard, mouse, and headset, and you’re on a budget, the Havit Mechanical Keyboard, Mouse, and Headset Kit is a great place to start.
Shopping for bundles can be tricky since oftentimes one of the items in the bundle is good, and the others are there just for show. However, there are some surprisingly good-quality options out there, and this Havit bundle is definitely one of them.
For $90 you get a full-size mechanical keyboard with a sturdy metal casing and mechanical switches that offer the feel, sound, and performance of a much higher-end product. It’s also equipped with some dashing RGB with 14 lighting modes and 7 different effects that you can choose from.
To top it off, the keyboard also has anti-ghosting and full n-key rollover, which assures that none of your keystrokes will go unregistered.
With the keyboard comes an equally impressive mouse that fits nicely in your hand due to its simple ambidextrous design.
The mouse has an adjustable DPI of up to 4800. This might seem very little compared to what many other mice offer these days, but it’s actually more than enough for an average gamer, as most people don’t usually go above 3200 even if they have a mouse that can go higher.
This, of course, varies depending on your monitor’s resolution, the type of games you play, and personal preference. Still, generally speaking, for the type of build $400 can buy, this mouse should do a marvelous job.
And as if this wasn’t enough, the bundle also includes a Havit headset.
If the keyboard was the best item in this bundle, the mouse the simplest, this headset can be considered the most surprising.
It can’t be called a high-quality item, and you’d be able to get better ones if you invested as little as $20 more, but considering the price, this is an amazing piece worth buying as a part of this bundle, and probably even outside of it for those on a tight budget.
The reason we called it the most surprising is that it has 50mm drivers and virtual surround sound that actually sounds incredibly crisp for such a budget option. It’s a relatively light headset and it has memory foam earpads, thanks to which you’ll be able to use it for hours on end without feeling any kind of pressure.
Besides the great sound, the headset also has a really solid microphone that should serve you well so long as you carefully handle it.
Now, this was our primary pick, but in case you don’t need all the items from this bundle, you can take a look at some of the other bundles from Havit that don’t include a headset. Or perhaps the Redragon S113 bundle, where the keyboard comes without the Numpad.
And if you want to get the items separately, we recommend the Redragon K552 mechanical keyboard in combination with the Redragon M711 Cobra mouse, for example. These two items are not a bundle, and they are slightly more expensive than the aforementioned Redragon S113 combo, but it’s good to be aware of different options.
Redragon is a budget brand, but despite their fairly cheap prices, they offer some excellent value products like the ones we’ve mentioned.
As for the headset, a great budget option is the RUNMUS K8 Gaming Headset. Just beware that it’s a little on the heavier side, coming in at around 0.66lbs or 300g. It’s nothing too heavy, but it may cause pressure around your ears after prolonged use.
These were a few of our favorite picks for this price range, but if you’d like to browse more choices, we encourage you to check out Amazon for some discounts. You can also take a look at the links provided above where we’ve compiled lists of some of the best keyboards, mice and headsets that the market currently has to offer.

Mouse Pad: Ktrio Extended Gaming Mouse Pad
Not many people have specific preferences when it comes to mouse pads, and few besides the pro-gaming community feel the difference between the grip of different materials in day-to-day use. An average user will mostly look at the size, stitching and price.
In this section, we tried to find something that would appeal to a wide audience, something good enough that wouldn’t leave even the most demanding users wanting, and that’s how we found the Ktrio Extended Mouse Pad.
Luckily, even the best mouse pads on the market aren’t too expensive, so without the price being an issue, we settled on something that had both great quality and timeless style — a pure black XL mouse pad.
It has a cloth surface smooth enough to allow the mouse to easily glide over it, without sacrificing control, stitched edges to prevent fraying, and a rubber bottom that sticks to the desk. The mouse pad is large enough to fit both your mouse and keyboard, and it looks great paired up with any color.
Unfortunately, though, Ktrio doesn’t offer any smaller versions of this mouse pad, so if the size of this one doesn’t suit you, we suggest taking a look at the HyperX FURY S mouse pads, or you can check out the link below for more recommendations.

Controller: Xbox One Controller
Having a good controller can mean a lot depending on what kind of games you prefer, but it’s not exactly a cheap peripheral.
Of course, there are a lot of cheap options out there, which are fine if you prefer using a keyboard and mouse. But if a controller is more your style, you need something solid and dependable, and for that our number one recommendation is the Xbox One Controller.
It has a familiar ergonomic design and color-coded buttons, and most importantly, it will last you a long time even if your play style is more on the wild side.
If you want a cheaper option, an Xbox 360 is also a viable pick, and if you’re a console fan, you might even have one of these two in your possession. Of course, the DualShock 4 is another amazing controller, but you need third-party software in order to use it properly in most PC games.
So overall, the Xbox One is the simplest, most headache-free choice.

Chair: BestOffice Mesh Chair
The final essential peripheral is, of course, the chair. But not just any kind of chair — you need a comfortable, ergonomic seat that won’t make your back hurt or make you slowly slide into a half-lying position with feet up on your desk.
Of course, these kinds of chairs can be very expensive, but there are a few that can be considered solid investments in the lower price range, and the BestOffice Mesh Chair is one of them.
In most respects, this is a pretty standard chair. It’s mostly made of plastic and mesh, and it doesn’t have any adjustability options besides the height and tilt resistance, which is essentially what makes it so affordable.
What it does have is an ergonomic design and decent lumbar support that will press neatly against your lower back and force you to sit upright. This is especially important if you are used to spending most of the day in front of your PC.
Now, normally, we would tell you to just choose whichever chair is the most comfortable and fits your budget. We’d even give you cheaper recommendations.
However, since this is the only peripheral that can harm your health and wellbeing, if you choose just any model so long as it’s cheap, we’d actually suggest saving up and investing in something more expensive if you’re in a position to do so.
This is because more expensive chairs are made with better materials, which means that they’re more durable. They have multiple adjustability options you can customize to fit your body perfectly, and ultimately, they are much more comfortable and have better spine and neck support.
Naturally, since this is a budget build, the BestOffice Mesh Chair remains our number one recommendation, but we had to mention the benefits of a better quality chair in case some of you are interested in exploring other options.
Closing Thoughts
And that’s that for our best PC build under $400. We hope that you’ve been convinced that you can own a perfectly respectable gaming rig with nearly endless upgradability, even if you don’t have thousands of dollars to invest in an expensive toy.
Now, don’t get too excited. You won’t be running any recent games at max settings with this PC. You will be running most games in 720p at around 30-40 FPS, though, which is quite good for a budget system.
Over time, you can install a dedicated GPU to give the graphics a boost, upgrade the processor, or add any of the many peripherals we covered. Like we’ve said, the upgrade possibilities are endless and the best part is that you can make these upgrades without any pressure whenever the opportunity arises.
Until then, this rig will get you playing today’s games from the get-go. For only $400, that’s not half bad.